Magnetic Spin Bike

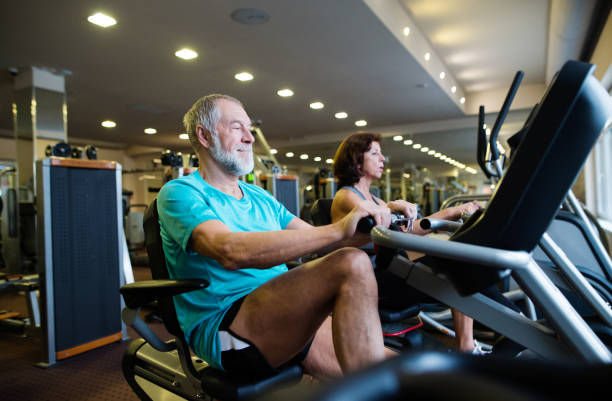
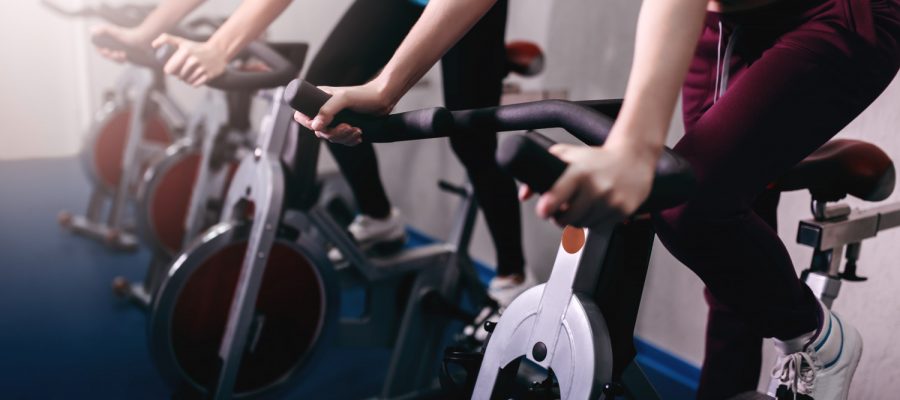
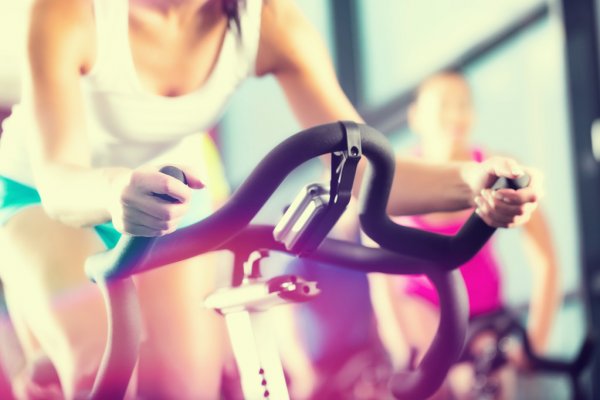
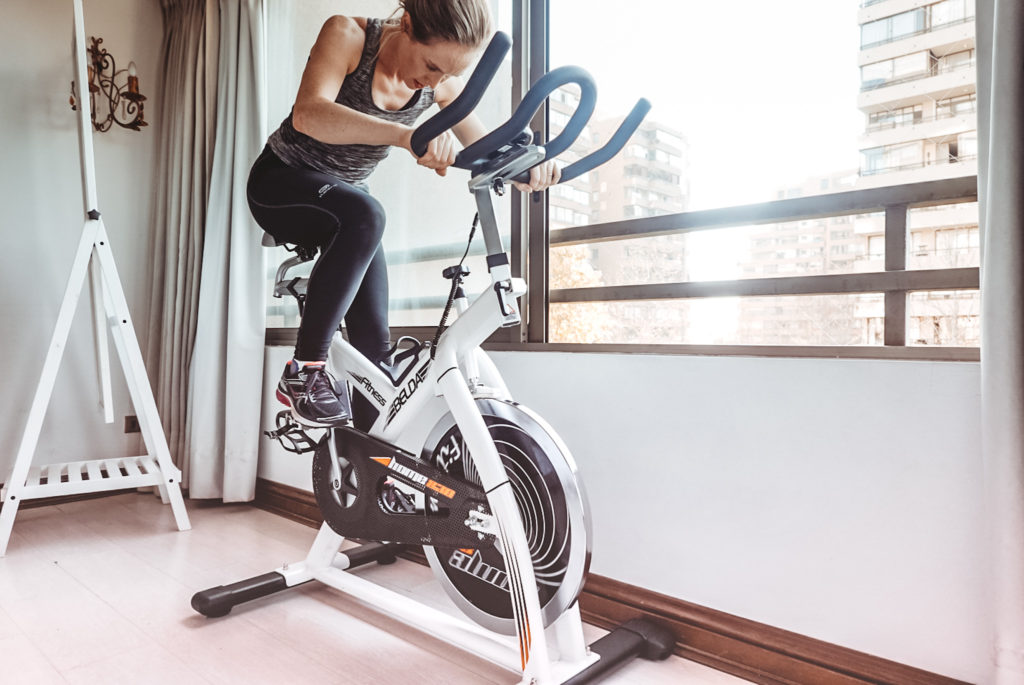
Spin bikes are a type of stationary bicycle meant for indoor exercise use, and the magnetic spin bike is no different, except that in exchange for a steeper price, it comes with an assortment of beneficial changes and alterations that make it well worth the money spent.

Let’s delve right into these specifics and more!

What exactly is a magnetic spin bike?

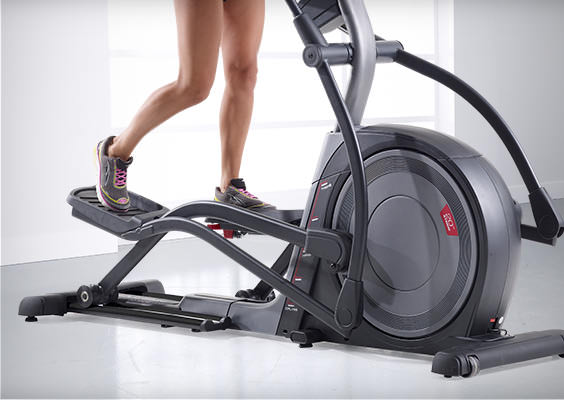
A typical trait of many forms of exercise equipment, such as an elliptical or a treadmill is the resistance feature, which relies on a large metal part called a flywheel that enables the user to adjust the overall “feel” of the machine and how difficult it is to walk, pedal, move or operate in general.

Flywheels store the energy from pedaling or walking and are used to change resistance levels.

The higher the resistance setting, the more difficult the workout feels, which in turn increases your calorie burn, muscle toning, and stamina; your sweat, and heart rate will increase, you feel more tired, and all that jazz of a typical higher effort workout.

Lower resistance settings are ideal to use for those who can’t or do not wish to put their body through too much strain, either from just starting out and getting used to their machine, or don’t want to risk aggravating an existing injury or condition.

Pictured: Spin bike by window.

Regardless of your preferences and needs, there’s a resistance setting to suit your purposes and desires!

What a magnetic spin bike does differently is use magnets for its method of resistance, rather than brake pads which have contact with the flywheel and its parts to generate the resistance.

So how does it work? What’s all this talk about magnets?

Two large magnets and the flywheel itself are all that is required to generate the resistance in a magnetic spin bike, the result is the flywheel rotating and intercepting the two magnets when the user pedals, and blocking their magnetic field, which creates the resistive forces.

On higher resistance levels, the magnets are closer to one another, which gives the pedals that ‘heavy’ feeling making it harder to pedal as they push against each other.

Lower resistance has the two magnets further away, making the force less and it easier to pedal, just like in the same way when you play with magnets by pushing them together and pulling them away.

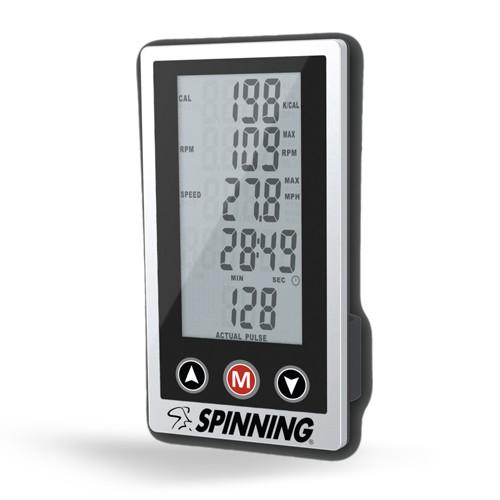
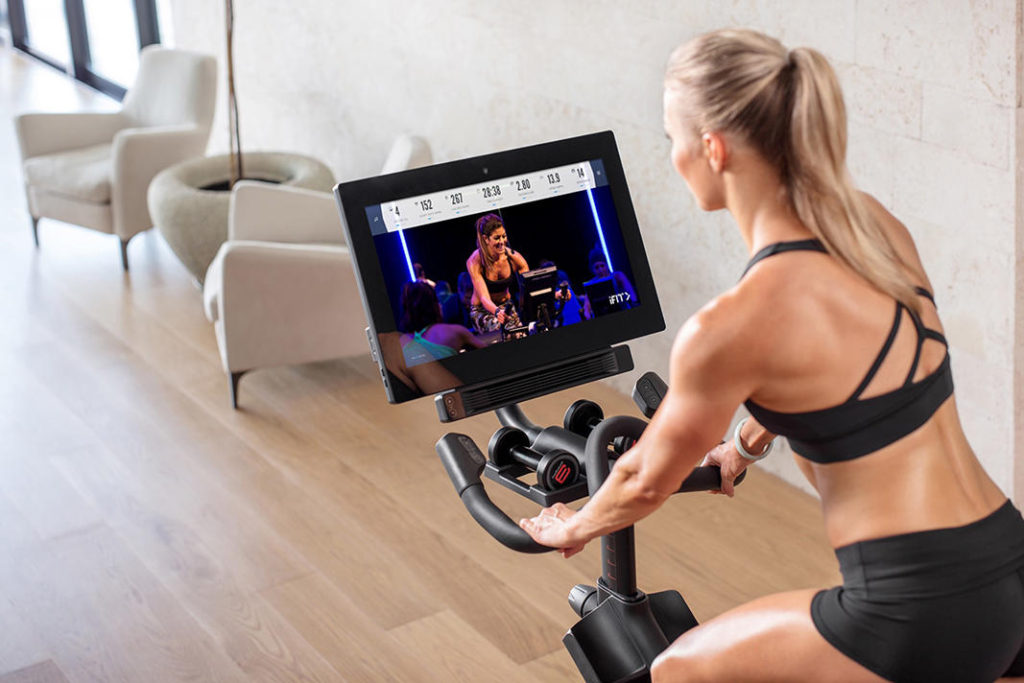
Watts? On a bike that doesn’t use a power source?

On your bike’s monitor screen, you may notice something confusing, a system of measurement described in “watts”, and this unit is essentially the “power” output of your pedaling.

Think horsepower, basically!

Some magnetic spin bikes have a measurement on their console in watts.

The watt system is a perfect way to track your progress in stamina and endurance, as it accurately shows you just how much power is being put into your pedaling, and how much energy you and your bike are producing.

The higher the watt number, the more energy is being emitted by your bike and by your movements!

It’s a great way to test your limits and experiment with how far you can go, and what goals you can reach.

Magnetic VS other types of resistance
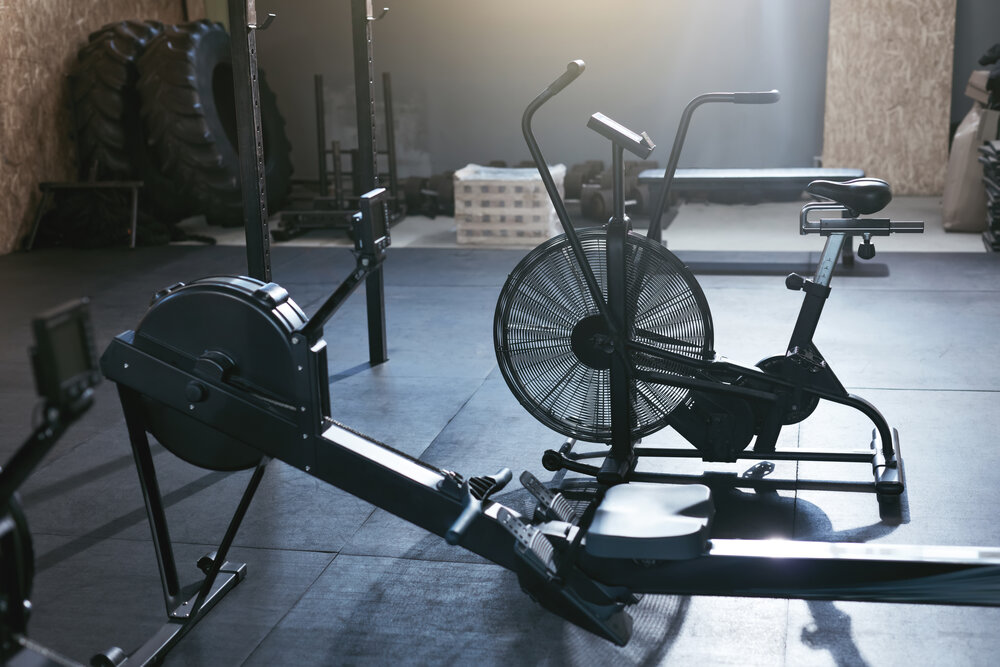
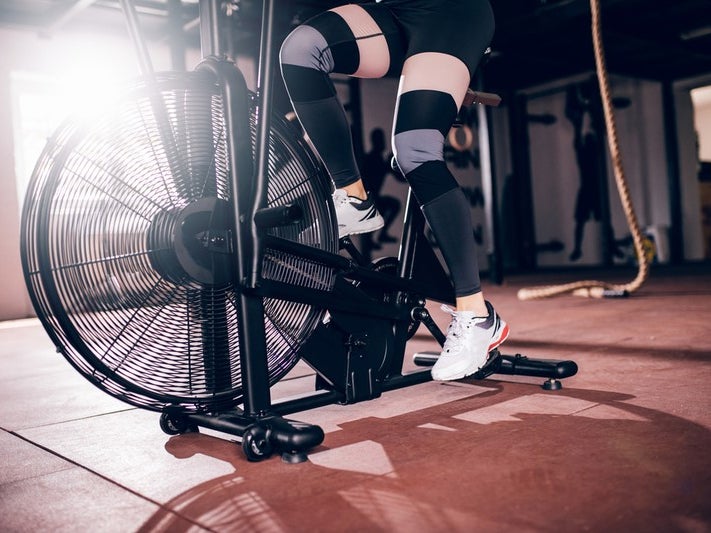
Air

Air resistance is just as simple as magnetic, as the bike uses a large fan to generate air and wind resistance, which increases or decreases depending on the speed the user pedals. 

There are fewer moving parts on bikes using fans, often making them easier to maintain and longer lasting due to lower maintenance needs.

Some bikes do have rather noisy fans, however, so that’s something to keep in mind when looking at a bike using wind resistance.

Contact

The most common method used in contact resistance is brake pads that are set beside and above the flywheel, these come into contact with the wheel on higher resistance settings, slowing its movement and making pedaling more difficult, thus increasing the effort needed to gain speed.

Lower resistance settings have the brake pads ease off the flywheel, generating less friction and making it easier to pedal.

Magnetic

As mentioned above, magnetic resistance bikes use two powerful magnets beside and above the flywheel to generate opposing force when they are pushed closer together at higher resistance levels, and less force when farther away on lower settings.

There is no need for lubrication or general maintenance besides occasionally tightening screws or loose parts.

What benefits can a magnetic spin bike offer me?

Little to no maintenance in comparison to a bike using another form of resistance

I’m sure everyone knows that the more complicated and complex the machine is, the higher the chance that something can go wrong, like a loose bolt or a part going bad.

This is the issue when it comes to resistance forms such as contact because the brake pads wear down over time and need replacement, other bikes can also use friction bands, and the same is true for them as well.

Some replacement parts can also be a bit costly, which is annoying as well since you of course wish to spend more time using your equipment than fixing or repairing it.

The benefits of magnetic spin bikes are that they use very few parts, and these parts do not have to roughly brush against each other, so this lessens the wear and tear and potential damage they get put through on a regular basis.

There’s nothing you need to oil, chain, charge, or hook, making them the most maintenance-free stationary bike and some of the sturdiest equipment out there!

Provides a better range of smooth and more consistent resistance

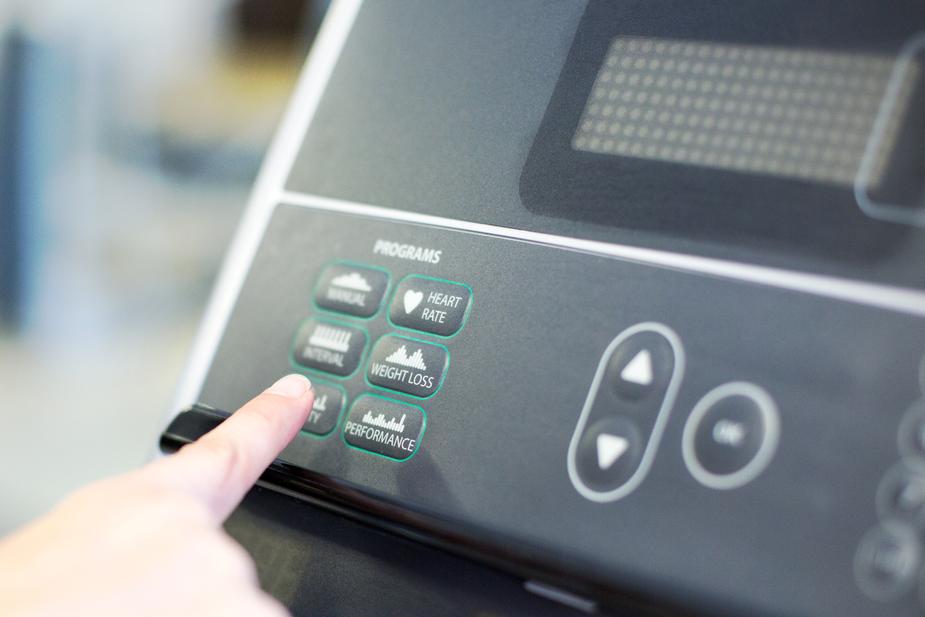
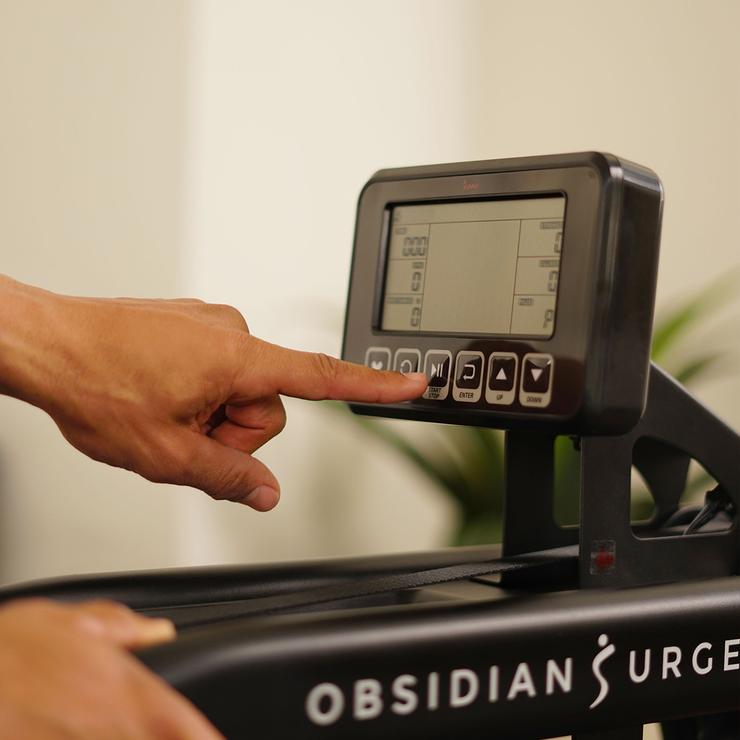
Changing or adjusting resistance levels on spin bikes using magnetic resistance is simple and easy, typically just with the press of a button on the console or a turn of a knob!

Being able to easily get a feel for the resistance or see it displayed on-screen is a big help for tracking your progress and dialing up the intensity as you improve.

These bikes also tend to come with pre-set programs to incorporate into your workout, generally working by having the bike change resistance settings on its own at set intervals, which keeps workouts less monotonous and repetitive.

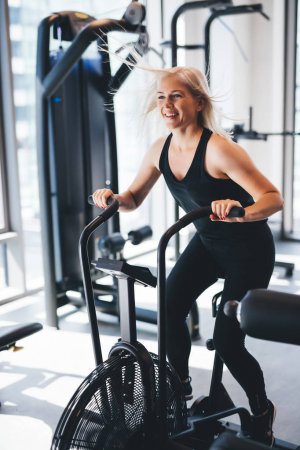
Magnetic spin bikes are great for workouts, as well as maintaining weight and general fitness!

Spinning is a great form of exercise due to its high calorie burn for considerably lower effort than other higher intensity machines or exercise equipment.

Spinning on average can burn about 260 calories, but spinning classes are geared towards higher intensity, so you can expect to burn anywhere from 400 to 600 calories.

You don’t have to attend an in-person spin class however to see those results, as online and virtual spin classes are available to use so you can reap the rewards on your bike in the comfort of your own home!

This depiction is possibly a bit of an exaggeration, but you get the idea!

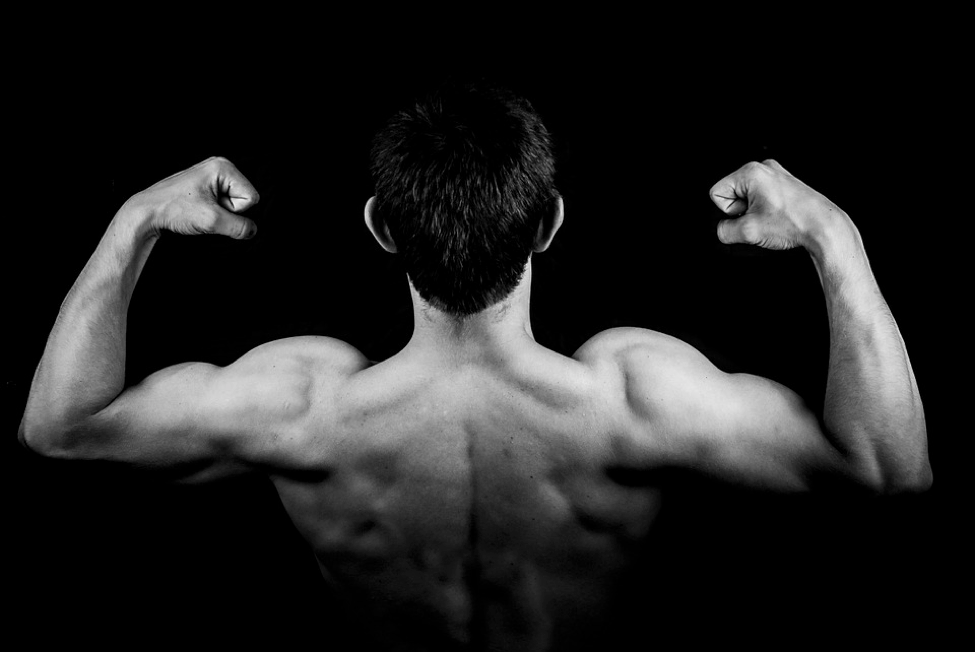
The results are often apparent by week two or three if exercising 3 or 4 times a week, as by then you will start to notice changes in your stamina, muscling, and body shape.

 And considering many people are understandably in a rush to see changes and try to often brute force the process when using their new workout equipment, it’s a great choice for those looking for fast and consistent results without the risk of hurting yourself by overdoing it.

Easy and safe for anyone to use; for all fitness levels

A common question many might ask is: do I have to be fit to use a spin bike or get started with exercising? 

Luckily, the answer is no in the case of these bikes, as they’re low impact, meaning super easy on the joints and body, so regardless if you are older, have pre-existing injuries, are out of shape, or have any issues that can make exercising difficult and painful, a magnetic spin bike is guaranteed to be one of the safest options available!

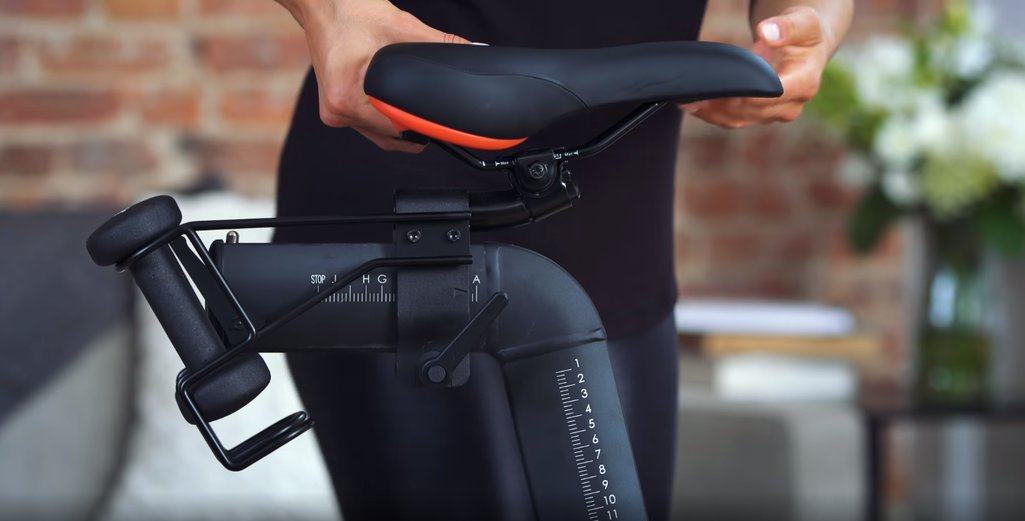
They also tend to be a one size fits all type of scenario, making it so the whole family can make use of the spin bike if needed, with a quick adjustment of the seat or handlebars, each person is ready to get their workout in!

Magnetic spin bikes offer a quieter cycling experience!

A major benefit of exercising with a bike that uses magnetic resistance is that because of the lack of moving parts, such as clinking belts, chains, brake pads, or others, the operation of the bike is almost entirely silent!

This makes using the bike in any room of the home or time of day convenient and unobstructive for everyone, and much less distracting, making it easier to focus on enjoying using your machine.

Other considerations

Cost

It’s important to consider your budget like always when thinking about making a new purchase, and this situation is no different, as the cost of magnetic spin bikes is higher than other varieties that use contact-based resistance settings.

Typically, these bikes start anywhere from 600 dollars to 2,000, and that of course depends on any extra features and add-ons that the bike comes with, so evaluating any features you feel are a must, and none of the ones you don’t is the best way to save money.

Magnetic spin bikes are well worth their initial cost.
Pictured: Golden Piggy Bank.

In the end, you save money in the long run by purchasing a magnetic spin bike over other types because of the long term durability and lack of needing any regular maintenance or replacement parts.

Weight limits

Something that’s often forgotten about in the feverish excitement of purchasing a new piece of equipment is weight limits, and that metric is imperative to keep an eye on when scrutinizing which bike specifically to buy since this will guarantee your machine will last as long as possible and continue running its best.

Many of these bikes have limits of 300 pounds or more, so finding one to suit your needs typically won’t be an issue.

The best clothing to wear for your spinning sessions

These items are not necessarily must-haves but are very helpful for maintaining comfort during workouts, as the right clothing can make a big difference in how you feel at the end of your sessions, and feeling good at the end of each workout is a major key to consistency.
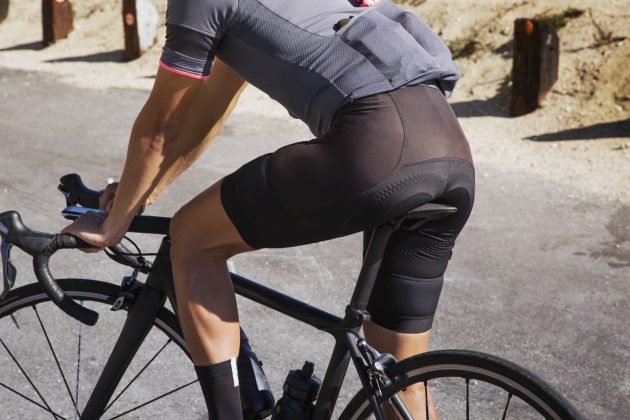
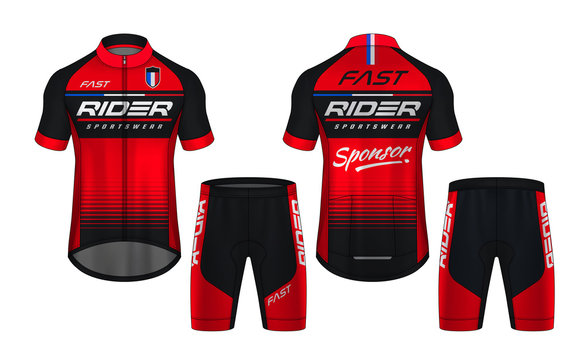
Bike shorts

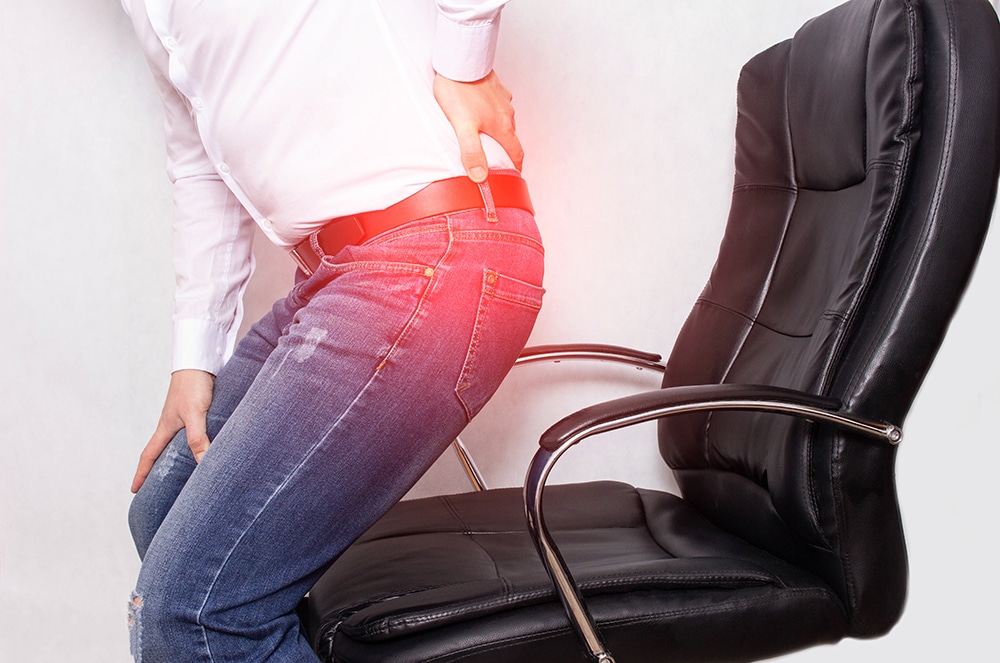
These shorts are designed to wick away sweat and moisture, as well as having padding on the groin and bottom area to ensure maximum comfort during sessions, as the bike seat can leave you with soreness, especially when just starting out.

Bike jersey

Similar to the shorts above, these jerseys are made to keep the sweat from drenching you and the clothing itself not being stuck to your body as if you just took a dive into the pool!

Discomfort is never motivating or helpful, so having a bike jersey specifically to wear during spinning sessions is very convenient.

Padded tights

If you prefer something with more length or just want to switch things up and have a little variety, padded tights can offer similar benefits to bike shorts by keeping you cool and comfortable.

Padded underwear

Sometimes it’s worth going the extra mile, and this is definitely true when it comes to considering wearing padded underwear for your spinning sessions, as they add an extra layer of comfort and help keep down on moisture buildup, which can lead to bacterial growth and infections down there, especially for women.

Spinning tee or top

Similar to a jersey, but lighter weight and no zippers, so easier to slip on or off as needed, and still get the cooling and moisture-wicking benefits.

You could also wear them underneath the jersey as needed if the environment you are exercising in is on the cooler side.

Comfortable cycling shoes

Considering the main part of your body being put through the strain from pedaling, aside from your legs, are your feet, and you will probably be doing spin sessions lasting anywhere from 30 minutes to an hour once or multiple times a week, having a comfortable and properly fitted shoe is essential to ensure maximum comfort and lessen the chances of any aches and pains.

Wrap up!

Magnetic spin bikes come with a large variety of beneficial features and traits, as well as extra add-ons as desired, their only downside is being more expensive than other forms of spin bike and stationary bicycles.

However, the phrase “you get what you pay for” rings true here, and the long term durability coupled with the quiet and smooth operation of the bike makes them well worth the price increase.

I hope this was informative, thank you for reading, stay well!

Upright Bike Benefits

Stationary bicycles, such as upright bikes, are a much beloved and trusted source of safe and effective exercise for people of all ages and health conditions.

They’re also great for eliminating excuses that keep you from getting your daily exercise in, such as the weather being bad, having to go to the gym, or the problem of having limited floor space for your equipment!

And the best part? They’re affordable, easy to use, and come with a whole host of positives!

Let’s get right into exploring the upright bike benefits and uses!

Upright bikes are perfect for low impact calorie burning and weight loss!

You don’t have to work out hard and overexert yourself at the gym or become an expert weightlifter or bodybuilder to burn calories and shed some pounds!

As even something as simple as riding a bike can help burn calories, and the more calories you burn every session, the easier and more effective it is to lose weight at a faster pace.

Upright bikes aid you in this endeavor by easy and low strain to use, prompting more consistency in your sessions; nobody feels motivated to hop back into their training routine if they feel beat down and haggard at the end of each day!

The above fact coupled with liberal use of the resistance settings on your bike to heighten the difficulty of your workout increases intensity, and a higher intensity equals better calorie burn, which in turn means more weight loss.

One of the upright bike's benefits is safe and effective weight loss.

Estimates of exactly how many calories per session you burn riding your upright bike can vary on a number of factors, such as your age, height, and weight, but an average of 260 to 400 per a moderate level of intensity cycling for 30 minutes is definitely doable.

Upping the length of your session as you gain progressively more stamina and can tolerate longer durations is also highly beneficial, as one full hour of cycling can put you at 400 to nearly 700 calories burned in that time alone!

For reference, something like a single pepperoni Hot Pocket can range anywhere from 310 to 360 calories depending on the type of crust and other additives, so burning this level of calories is no small number.

  The upright bike benefits your muscles by engaging more of them than other exercise bikes.

This aspect is another benefit for weight loss and putting on some healthy muscle, because as more are engaged and exercised, the higher the calorie burn, and the more muscle you put on also heightens your burn rate.

Upright bikes generally have you leaning and bracing yourself with the handlebars as you pedal, which engages your upper, lower body, and core, unlike similar machines such as the recumbent bike.

Basically, if you are able to ride a regular bike comfortably and without strain, and wish to burn calories, lose weight, and or put on muscle then an upright bike is a fine choice for you.

A recumbent is a better choice for those with back or mobility issues, as while it has you in a comfortable reclining position, this isn’t as conducive to weight loss or muscle toning, nor the exercise of higher intensity needed for such.

Upright bikes also benefit from being more versatile in the positions you can choose to ride in, so if back pain occurs from leaning too far or a specific position, changing up is simple, and can better focus on other muscles if desired.

 While the pedaling motion can especially benefit the legs and lower body with their toning, bikes with handles are the best choice if looking to make the workout more of a full-body one, so the arm and shoulder muscles can get in on the action.

The upright bike benefit’s from having access to a large array of technological features and advancements!

These exercise bikes have been around a long time, and this benefits them in two major ways; one, they’re cheaper and more readily available, and two, they come with every tech feature known to man if you so desire!

From simple to sophisticated, there’s a whole world of features and other bells and whistles and add-ons to explore, so here we will get to a rundown of the essentials and most common ones.

1.The console

Conveniently displays the time and duration of your session, the speed, and cadence of your stride, heart rate, calories burned, and often settings for the upright bike’s preset programs to adjust your workouts easier for your height, weight, age, or gender.

The upright bike benefits from having a convenient console system with many settings and uses.

Many have the option of LED lighting and easy to use touch screens for simplicity and a familiar style of use.

2.The adjustable seat

Comfort is the name of the game and the key to consistency when maintaining your exercise regimen, so why sabotage yourself by enduring unnecessary soreness and pain at the end of each session?

Adjustable seats aid your comfort level by ensuring your back is properly aligned and you can maintain the ideal riding form and position, which lessens the strain and soreness that indoor cycling can cause.

Many upright bike benefits from the trait of the seat coming pre-set already, but like everything, it’s not a one size fits all situation, so having the ability to adjust the seat to accommodate your height and length of your legs is a big help!

3.Resistance settings

Essential for tailoring your workout however you want it and whenever you want it, this setting is used to control how “difficult” and “heavy” your pedals feel when cycling, which heightens the intensity of your session and offers variance and an overall different feel.

The upright bike benefits from a wide variance of how many levels of resistance they offer, typically they have 16, but some can have as many as 32 forms of resistance and variation in intensity.

4.Tablet and phone mount

Another common and helpful feature included is a holder for your tablet or smartphone, which enables you to listen to music, watch a movie or video, and even attend an online spin or cycle class!

Being able to distract yourself during the workout can help the time feel as if it has passed by faster and make sessions more enjoyable and less repetitive, helping you stay consistent!

5.Adjustable handlebars

Like having an adjustable seat, this feature is essential to ensure comfort and lessen pain from poor posture but also helps to offer variance and versatility in your stance during cycling sessions.

A bonus of the above is if the bike is for the use of multiple people in your home, as the bars and seat can be changed accordingly to accommodate every individual’s needs based on aspects such as their height, arm length, and preferred riding form.

6.Water bottle holder

This is one of those “smaller” things that can become really annoying at the moment, as it may not seem super important, but without a water bottle holder or some form of rack to put your drink in, you’ll probably have to settle for an awkwardly placed and sized stool or table to place it on top of.

When you’re exercising, you generally wish to do everything in one simple motion, including reach for your drink, take a swig, and resume, so a holder is certainly helpful in these cases.

Offers a more traditional cycling experience

Whether you’re training for a marathon, or just prefer the familiar and easy to do form of exercise such as cycling, upright bikes mimic the typical bike riding experience more so than other forms of stationary bikes, making them simple to get used to, and convenient for everyone to use!

The upright bike benefits the consumer by being affordable by the budget conscious

A major elephant in the room when considering any product, equipment, or gear that’s intended to make you healthier is always “how much will this cost me?” 

Striking the balance between breaking the bank and affordability is important, since being broke or in debt after your big purchase definitely isn’t motivating nor useful.

Thankfully, in the case of upright bikes, there are wide varieties of types, features, and traits, from complex to basic to suit your price range needs!

They have a wide range of costing anywhere from 200 to 2,000 dollars, making them affordable for many households and people from most means, so shopping around and picking the bike with all the traits you wish and none of the ones you don’t can help you save money in the end.

Compact size and shape saves floor space

Another major point to consider is, even if you can afford the tool of your dreams, where is it going to go?

Especially since many of us live in apartments, small homes, and other shared spaces, making it difficult to have more than a single room to ourselves nowadays.

Luckily, the upright shape and compact size of the upright bike help mitigate the issue by making them easy to find a place for and store when not in use.

Many of these bikes don’t need more than a small corner of a room or garage to set up in, making them ideal for spacial restrictions and removing one of the more common aspects that bar anyone from being able to keep fit in the comfort of their own homes.

Great for cardiovascular exercise!

One of the major upright bike benefits is that they’re a perfect tool for cardio, and this is amazing news because the importance and health benefits of cardio cannot be understated, as cardio and aerobic exercise have been found to strengthen your lungs, heart, and other muscles, as well as increase oxygen and blood flow throughout the body.

This process leads to a wide variety of positive changes, such as lowering your blood pressure, boosting your immune system, improving sleep, positive effects on mood and blood sugar, and even better memory and brain function!

Stationary bikes such as upright bikes are perfect ways to get in cardio exercise, as they’re low impact and do not strain the body or worsen any existing issues with the joints, making them an ideal choice for people of all ages and health status.

Wrap up!

In summary, upright bikes are a time tested solution to many fitness-related woes, such as tools being out of your budget, not having space for your equipment, or risking aggravating an existing injury.

As well as bringing a whole breadth of benefits with them, upright bikes are a must-have for anyone looking for something affordable, convenient, easy to use, and as well as safe and effective!

I hope this has been informative, as always, leave a comment if you desire, and best wishes in your health.

Exercise Bike Seat

Exercise bike seats are something that, while everyone knows about, not many people give them much more than a passing glance, let alone a second thought!

This carelessness is a mistake because the proper fitting, cushioning, and shaped bike seat is essential to a comfortable and efficient riding experience that’s soreness and pain-free!

So, here we will go over the significance of the exercise bike seat and its importance!

Why care about your exercise bike seat? Isn’t this an insignificant detail to sweat?

Actually, no! The right seat is one of the most important aspects of your exercise bike since it determines how smooth and enjoyable your riding experience will be, or it can do the opposite and make it painful, soreness inducing, and demotivating.

Common problems include things such as the seat not being the right shape for your butt, not enough cushioning or support, or the seat is angled too high or too low, causing back pain and putting more pressure on the lower body.

Suitable and fitted seats help absorb and reduce the strain and shock of the motions, helping you stay comfortable and pain-free!

Types of exercise bike seats

Indoor

The indoor bike seat is the type you commonly see perched atop spinner bikes and other related types of stationary bicycles, molded the most similar to regular bikes than the rest of this grouping, these seats are built to cushion and absorb shock.

It’s imperative to have these seats adjusted to just the right angle, however, to get their full benefits, as they need to be not too close or too far from the handlebars so that you have a comfortable lean and posture over them while riding.

Repeated adjustments of the seat’s angle can help you figure out what position feels the most natural and comfortable!

Recumbent

Recumbent bikes are well known for their low impact and very comfortable seated reclining position, making them amazing for people with back problems, and the seats of these bikes are no different.

The recumbent bike’s seat is pretty close to a traditional seat or chair almost, as it enables the rider to sit and lean comfortably while pedaling, giving them ample support and cushion all the way.

Upright exercise bike seats are optimized for comfort.

As always, proper riding form is essential to reap the most benefits, especially the comfort and ease of riding, but there is generally far less chance for user error and pain-related problems with this type of bike.

Basically, it’s the most novice or newbie foolproof, so the best choice for those wary beginners.

Upright

These bike seats are the standard for most exercise bikes, generally built like a more cushioned version of an outdoor bicycle, so they’re very comfy to ride for extended amounts of time.

A common issue to take note of, however, is the size and shape of the seat, as some can be too high or set at the improper angle so your thighs rub against the seat, which can cause irritation.

Another problem that can cause the thigh rubbing is the seat itself being too wide, so it’s important to gauge how it feels for you and if you might need to consider purchasing a different one.

What are exercise bike seats made out of, anyway?

Most seats have a hard plastic mold as a base and with an inner material that is often comprised of a thin layer of foam and can be combined with anything from leather, vinyl, rubber, canvas, and others.

A urethane-based spray adhesive or neoprene is generally used to bond all the materials together. 

Tips for a more comfortable riding and workout experience

1. Exercise bike seat cushion covers

It’s not the end of the world if your bike seat seems to inherently just be simply uncomfortable to sit on for extended periods of time, as seat covers can be used to offer extra padding and help with a more smooth riding experience.

They come in many shapes and possible sizes in order to accommodate all seats and saddle types.

2. Wearing comfortable and cooling clothing for your cycling sessions

An often forgotten about aspect is the clothing you wear while riding on your exercise bike, as that can make a big difference in enjoyable you find the ride to be.

Nobody likes the feeling of clothes sticking to you from sweat, annoying and bothersome chafing, or any similar annoyance, which is why loose and cool clothing, in particular, bike shorts to wear specifically when you’re riding, can be very helpful and go a long way to keeping you comfortable.

Some spinning bike shorts or other indoor cycling shorts have added padding in the crotch area to prevent friction and chafing, as well as to wick away moisture, which is especially important for women, as to lessen bacterial growth.

Proper riding gear is a great choice to up your comfort level, along with the best seat possible.

Spinning or cycling jerseys also can be worn and be very helpful for wicking away sweat on the upper body and keeping you cool, they also have a zipper which makes them easy to take off at the end of each session.

Finally, there are cycling shoes or cleats that are made specifically for exercise bike riding, making gripping the pedals smoother and easier.

3. Adjust the exercise bike and seat’s position and angle

This is one of those obvious and simple fixes that make you feel stupid for overlooking them, but sometimes, it really is just as simple as adjusting your handlebars, seat position, or even the base it connects to’s angle differently than before.

Changing one or all of these features can make a whole world of difference, so it’s best to rule this out before trying anything more extensive.

4. Consider purchasing another seat

Sometimes the issue is simply the seat itself not working out rather than some form of user error. 

Having the proper seat for your exercise bike is essential to limit pain and soreness.

This problem can be a result of it not being the right shape, size, or offering enough cushion and support for the individual, either way, there’s nothing wrong with experimenting on various seat types to find one that reduces or eliminates the soreness.

5. Make sure you’re not leaning excessively on the seat

One of the most common problems that can create soreness is very preventable as well, and it’s caused by leaning excessively far back or forwards on the bike seat.

This posture problem can create soreness in the butt because of the bones and muscles bearing too much of the body’s weight without proper cushioning and support.

6. Change up your riding position every so often!

 Yet another one of those more “obvious” solutions, but still very important and essential to keep in mind!

Changing your position and checking if you are overly hunched over the handlebars or leaning too far can help a lot to keep the body from getting stiff and sore.

Varying your riding position every ten minutes or so can be a big help.

7. Give your body time to adjust to the new routine!

Soreness, stiffness, and any other unpleasantness that comes as a result of riding your exercise bike is more than likely just temporary, so it’s important to let your body adjust before throwing in the towel or feeling like you have to be stuck with a painful workout forever!

The discomfort caused by exercise bike seats should generally be temporary.

Generally, these issues resolve themselves with a few changes such as the ones mentioned previously and a little bit of time for you to adjust to your new routine.

Exercise bike seat discomfort: Tips and helpful tricks for women!

  • Wear breathable and moisture-wicking fabric riding shorts as this will, in turn, prevent the moisture buildup that can cause bacterial growth and infections in and around the groin area.
  • A painful and itchy problem, but thankfully preventable!
  • Riding shorts or mountain biking shorts can also increase the grip and give better traction if friction and sliding around on the seat while riding is a problem.
  • Many cyclists recommend not wearing underwear underneath your riding shorts to lessen possible chafing of the chamois pad and the seams of your underwear. 
  • This can also couple with sweat buildup, so it’s important to wash them as you would your undergarments after finishing.
  • Showering after a heavy cycling session to rinse off the sweat and drying your body well can also go miles to preventing the beforementioned difficulties of moisture buildup and bacterial growth!

Wrapping up:

Exercise bike seats can be deceitfully complex but important features of your indoor cycle, so ensuring the right fit, size, shape, and angle is essential to an enjoyable riding experience.

Combining this with the proper clothes and footwear, and you’re all set to have many comfortable spinning or biking sessions!

I hope this has been informative and helpful, thank you for reading!

Belt Squat Machine

Barbell back squats are a beloved and trusted method of building muscle in the lower body, especially in the legs, and for good reasons. 

Consistent training using this method can create explosive development in the legs and thighs, something many weightlifters, bodybuilders, and fitness enthusiasts alike aspire to achieve for themselves!

The technique itself may be older, but new additions to the world of squats and the invention of more modern technology have made achieving this goal far simpler, more effective, and, most importantly, safer than ever before!

Discover; the Belt Squat Machine!

The Belt Squat Machine has a far lower risk of injury than other forms of gym equipment

While everyone gets eager when they hear of the potential gains and major benefits that the barbell squat can give them, many do not stop and think of the risks and issues that might arise from their new training regiment.

 I’m sure anyone can agree that gungho and enthusiasm are a very welcomed thing, especially when starting new routines that are supposed to improve your health and wellness, although, the complacency and the injuries that can accompany it are not so much a good thing.

This exact situation is a common problem for many, but the belt squat machine is a real game-changer for everyone because novice and expert alike can benefit from the lessened strain, pain, soreness, and potential injuries to the muscles from doing such intensive heavy lifting as the barbell squat, all while still having access to its vast array of benefits!

Barbell back squats are highly effective, but straining and take their toll on the body. The Belt Squat Machine is significantly less problematic.

The machine does this by allowing you to bear more of the weight on your body itself, and less of it on your spine, shoulders, and lower back, essentially redistributing the weight and force that your body has to endure.

The reason is because of the weight-bearing belt placed on the user, helping keep you in the proper squatting formation and taking a bunch of the load off.

It concentrates the weight on the hips and legs instead of the spine and upper and lower back, making this great news for athletes with back problems or those who cannot bear weight on their spines for any reason.

It also means that you can squat with more weight than you ordinarily would be able to than if that pressure was concentrated on your spine, but remember not to overdo this and start building up the weight you’re squatting with gradually!

The belt squat machine offers incredible muscle building and toning, especially for the legs and lower body

I’m sure everyone has seen memes about never skipping “leg day” and it’s easy to understand why considering the legs and glutes are some of the most outwardly visible muscle groups, so anyone can tell when you’ve been slacking!

Bodybuilders and athletes of all kinds pride themselves on both the look and functional ability of the legs, and that’s because they’re one of the key ingredients to the success of the individual athlete.

But what if you’re just an average joe who wants impressive leg gains, but cannot do squats that require heavy spinal loading, such as the barbell squat?

Are you just doomed to forever skip leg day and neglect your lower legs and glutes?

Luckily, there are a few solutions for this problem, and one of the best being the belt squat machine, as anyone from expert or novice alike can reap the benefits from this amazing machine, all without destroying your back or worsening your existing issues in the process!

One of the other major benefits of the machine is the safety of it, especially relative to other types of fitness equipment or other squats that regularly make use of heavy weights such as large barbells.

Muscle hypertrophy is easily achievable using the belt squat machine!

There is always a risk of injury when it comes to lifting, and while that can be scary and potentially off putting, it’s also just flat out dangerous at times, especially if you have any form of weakness in your shoulders, arms or, back that could result in the weight slipping out of your grasp!

This issue is thankfully is a thing of the past when it comes to technology like the belt squat machine, as it enables you to lift and secure weights of all sizes and heft without the risk of injuries related to them!

Many designs also come with handrails for better grip when squatting and offer more stability, so remember to shop around and find one with all the features you want, and none of the ones you don’t to keep costs down, which brings me to my next point.

Costs and other considerations

Of course, all the proposed benefits of the belt squat machine are rather enticing, but a major sticking point for many is its prohibitively expensive price tag.

Generally, these machines can run anywhere from 2,000 to 3,000 dollars easily, but, in recent times, cheaper options are becoming more readily available, such as some models going for about 600 to 1,500 or so, making this a stiff purchase, but not something that entirely prices out the average person if they set aside some money to budget for the machine.

Another important fact to consider is the belt squat’s size, as they tend to be very heavy and bulky, so, definitely not easy to move around or shove in a corner somewhere, so foreplanning with where you intend to keep the equipment and where it might fit is best to do before you bring home your machine.

There are options though if either the above issues prevent you from getting ahold of a belt squat, which is to try purchasing a dipping belt, have access to a solid platform, and use a kettlebell, and do hip belt squats yourself.

The downside is that when squatting freely with a kettlebell, you’re limited with the amount of weight you are able to tack on, and it can be awkward finding a sufficient platform to stand on, but in general, it is considered to be the best alternative to the machine.

Kettlebell squats can be an alternative to the belt squat.

Techniques like the above can achieve similar results and are fairly affordable for the average person, plus you can get a good feel for how much use you might get out of a machine by how preferable the belt squat itself feels to you, which is a great idea considering the costs and space usage.

It’s also essential to perfect proper squatting patterns before investing in a belt squat machine, as improper form can lead to risks of injuries and your squats not being as targeted or effective as they could be!

Wrapping up

Be it hip belt squats with the use of a dipping belt and kettlebell, or taking the plunge to purchase a belt squat machine and up your squatting to the next level, both are highly effective and trusted ways of building explosive muscle development in the glutes, legs, and thighs, which is beneficial for anyone who wishes to enhance their sports performance, or just the average person looking to grow their leg strength and reap the benefits.

And best of all, both are highly safe and effective for those with back problems or other issues that prohibit typical barbell squats, and without the risk of injury from dropping the weight.

I hope this post has offered insight into your decision, and what might be the best fit for your individual circumstances!

Thanks for reading, and well wishes!

Arm Blaster VS Preacher Curl

The biceps are a common focus for many strength trainers, bodybuilders, casual weightlifters, and workout enthusiasts alike, and it’s no wonder, considering they’re one of the most visible muscles of the body, often shown off in movies, magazines, and other forms of media. 

As well as in person, of course!

As a result, the demand for the best tips, tricks, techniques, and equipment to achieve this much sought after goal of bigger biceps has only amplified over time, drawing many to modern and old devices.

Here we will go over two of these methods and explore their similarities and differences, and let you decide which of the two will be the most beneficial!

What is an Arm Blaster?

The arm blaster is a simple and straightforward device, worn with straps around the neck and a flexible metal band around the midsection, enabling the tool to help to restrict the more unproductive movement of the arms to make curls more effective, preventing the user from “cheating” during them.

Which is to say that cheating is whenever your body takes the ‘easy way out’ and lifts unproductively, but more comfortably and with less effort than what would be exerted otherwise using the proper form and technique.

The arm blaster has many similarities to the preacher curl.
Pictured:
Arnold Schwarzenegger doing curls with an arm blaster on.

The arm blaster is designed to maximize the efficiency of the bicep curl exercises by aiding the user in keeping the proper form, as well as isolating the biceps themselves.

It is an old school device, but one that has been returning to the mainstream again in recent times.

What is a Preacher Curl?

Technically, the preacher curl is not a device in and of itself, unlike the arm blaster, but is a particular bicep building activity belonging to a group of lifting exercises known as bicep isolation exercises. 

However, there are rack mounts and preacher curl station machines meant to aid in doing the curls and other related activities, which is especially helpful for beginners and novices rather than trying to go it alone.

The preacher curl can be performed using a weight bench at a 45-degree angle and a barbell, or either of the above attachments or machines, other weights are also usable options.

Preacher curl stations offer similar benefits to using the arm blaster.
Pictured: two images showing how to one hand bicep curl.

It is performed by first holding the barbell with the palms facing upwards, then placing the armpit on top of the bench and lowering the barbell to a 45-degree angle.

Head to head, Arm Blaster VS Preacher Curl:

The Breakdown!

Summary of the differences between the two tools

The differences between either a preacher curl station, a preacher curl rack mount, or the arm blaster are generally apparent just from taking a small glance at them.

A preacher curl station is a large machine, a staple in many gyms and fitness clubs alike, the tool has a seat, a pad for the arms, and a holder for the barbell to slide into, giving everything the user needs to perform the exercise.

The mount is attached to a power rack and resembles the pad that is typical of preacher curl stations, which is a good option for those who are limited in space and don’t think that they may be able to fit a full station.

The noticeable difference in the arm blaster is that it’s basically as long as a belt, lightweight, and easily slipped on, straps attached, and stored.

It is a great choice for those who are limited in space or want something that has less chance for user error, such as the preacher curl station, given it allows the user to ‘cheat’ if not used correctly.

Arm blaster VS Preacher Curl: comfort and ease of use

There is an advantage to the preacher curl station over the arm blaster for comfort, as some users report soreness in the muscles when first using the blaster because it uses and puts a strain on parts of them that are often not used.

The preacher curl only requires you to sit and lean at an angle when lifting your weight, while the arm blaster has you restricted to keeping your arms against the trunk of your body and may put pressure on the triceps potentially, which can range from slightly uncomfortable to annoying for some.

Using either the preacher curl station or arm blaster is very simple, considering with the blaster, you slip it on and pretty much are restricted to doing only the movements it lets you perform easily, and with the station, you just sit, lean, and lift.

This added freedom can be an advantage, or disadvantage, depending on how you look at it, however.

Considering your body is unrestrained, unproductive movements and improper form are much easier to do, thus making mistakes and user error more of an issue than with a blaster, so novices to doing curls may choose to use an arm blaster instead if they want to lessen the chances of doing them incorrectly.

Arm blasters can cause soreness in the muscles of the back, arms, and elbows though, especially for people not used to using them, because the position is somewhat unnatural.

They can also be irritating for those with larger biceps if the size and shape of the arm blaster are incompatible with the body type of the user, though this problem can be solved by finding a better fitting blaster.

Generally, though, preacher curl stations are considered better for the newbies as a rule since they’re more comfortable and less awkward to use.

Arm Blaster VS Preacher Curl: versatility

As a whole, curling using various weights, such as an EZ-bar or dumbbell, is less awkward with an arm blaster, and again, fewer chances for user error and unproductive lifting, given the restriction of the body, as opposed to doing the same using a preacher curl station.

It definitely can be done using a curl station, but the proper technique and form are needed to ensure the accuracy of the results and efforts of your time.

It depends on what your aim is, so I recommend experimenting with both and seeing which one better suits your comfort and experience level, while still getting satisfactory results.

In conclusion

Generally speaking, arm blasters are more affordable and less prone to improper use than a preacher station but are considered to be less comfortable for beginners and novices, however.

Cost-wise they’re not vastly different from each other, with many arm blasters ranging from 30 to 150 dollars max, and preacher stations starting at 70 to 350, so neither is break the bank expensive, so your choice may likely come down to simple preference for either of the two.

Preacher curl rack mounts can save space for those in small homes.
A preacher curl rack mount

As mentioned, preacher curl mounts for power racks are also an option and generally are anywhere from 50 dollars and up, so they’re also fairly affordable for the average joe on a budget.

Those low on floor space may find the arm blaster or the mount to be better options for their situation, especially if you already have a power rack in your arsenal.

As a whole, both preacher curl stations and arm blasters share many of the same benefits and a few disadvantages, but both tools are highly effective for bicep isolation and muscle building, so generally, it comes down to personal preference in a lot of cases.

Thank you for reading, and I do hope this was informative and helpful!

Best wishes!

Arm Blaster Benefits

The arm blaster is an old school tool that is often forgotten amongst modern bodybuilders and weightlifters today, but that doesn’t diminish their usefulness nor does it make them “outdated“!

And with larger companies coming out with their own newer twists on the device, I feel it’s important to revisit the arm blaster benefits and uses!

Arm blaster benefits, and what exactly is this tool?

The arm blaster is a piece of fitness equipment comprised of a flexible aluminum band that fits on the midsection of the body and straps that go around the neck to keep correct form during bicep workouts such as curls.

They aid the process by isolating the two major muscles of the biceps while keeping the other parts of the arms and body restricted, thus helping maintain the form that is more conducive to building muscles in the biceps during curls.

Lightweight

One of the main arm blaster benefits is that they generally are made of a sturdy yet lightweight metal that makes it easy to affix to the user and wear comfortably, which is beneficial because you definitely don’t need extra weight and strain on your body when you’re already lifting heavy weights in the first place!

Easy to use

It doesn’t really get much easier than this, considering all you have to do to use the arm blaster is slip it on over the upper body, fitting the band on your midsection, straps on the shoulders, and the strap around the back of the neck. 

Arm blasters have many benefits and uses, especially for curls and building muscles in the biceps.

No complicated mechanisms, lengthy setup, or hard to figure out settings and buttons here!

Easy storage

Another factor in this list of arm blaster benefits is due to their small and convenient size, the tool can be easily stored away on a shelf, in a drawer, or really anywhere you please, since they take up virtually no space.

A common problem with any sort of training, fitness, or gym equipment is their hefty weight, bulky shape, and the capacity to take up entire corners or sections of your room and house, leaving you with little floor space to work with.

This, however, is certainly not a problem with the arm blaster, considering it essentially is the length of a long belt, making it easy to put away when you’re done using it.

Not super pricey

It’s also worthy of note that another one of the arm blaster’s benefits is the fact that they’re not exorbitantly expensive, which is commonplace for most types of fitness tools, thus barring a lot of people from entry, and discouraging many new people from picking up their gym or fitness hobby before they can even start!

And generally, if they’re not breaking the bank, you often are sacrificing quality for the sake of a lower price, which also isn’t desirable.

Luckily, this isn’t the case for the arm blaster, as plenty of perfectly serviceable and well-made ones sell anywhere from 30 to 150 dollars, depending on features, build, and their general make, so definitely not bad!

Helps maintain and improve proper form

It is the arm blaster’s purpose, after all! And it does that well by isolating the muscles needed to build up your triceps, as well as restricting the movements you don’t need, which can hinder your progress by lifting or curling with poor form.

Versatility

You have a wide variety of choices when considering which weight to lift when using your arm blaster, like dumbbells, E-z curl bars, and even straight bars are perfect for curls when using the arm blaster, once again, sometimes it pays to have a simple yet effective tool.

One of the benefits of the arm blaster is their versatility.

Less is sometimes more when considering any difficulties or complications that may arise with your gym equipment.

What are the cons of the arm blaster?

The arm blaster can be awkward and uncomfortable to use for some people, depending on certain factors.

An important note to remember when shopping for your arm blaster is that, as with any fitness equipment, they are not a ‘one size fits all’ type of thing, so, essentially, it’s a wise idea to double-check the measurements and specifics of the blaster itself.

And if in doubt, there are a few ways to go about finding the necessary information, such as if the arm blaster will fit on your specific build and body type, as well as allow comfortable use.

 Asking the sellers or manufacturers about your tool to see if you can feel more assured that your blaster will be the best fit for your situation, and checking in on bodybuilding and other fitness forums for reviews and other people’s experiences can be a big help when determining specific questions and concerns.

Especially the ones not found or easily perceivable in a manual, product photos, or booklet for the tool; little things like if there are any unfortunate sharp and or pokey bits based on poor manufacturing, or the material feels brittle or low quality, etc.

 Other factors such as size, shape, encountering a user with a similar body type to yourself, and seeing how it fits for them, etc are all extremely helpful to quell fears and find out more about your specific arm blaster benefits, especially if the blaster you’re planning on purchasing is on the pricey side!

It can be highly intimidating to ask questions and go into a public setting, even if that place is online and not in person, especially if you feel that you may appear unknowledgeable or inexperienced, or feel “stupid” for asking a potentially obvious question.

Asking for tips, tricks, and advice is important when trying to maximize the benefits of your arm blaster.

But it’s an important mental “block” and bridge to cross during your health and fitness journey; remember, everyone starts somewhere, and no one knows absolutely everything!

There’s nothing like personal experience and advice straight from the horse’s mouth of other buyers to help aid you in any current or future purchase decisions! 

Some aren’t very flexible, depending on the materials used.

Considering how one of the arm blaster benefits is restricting unproductive movement for easier and more effective curls, you don’t wish to feel constricted as if a large snake is wrapped around your upper body!

Some arm blasters have more bendable material and parts than others, and some come with padding around the neck for added comfort as well, so shopping around for the one with the traits that will satisfy you and keep you comfortable is a must!

Just like how eating healthier doesn’t have to mean the food is tasteless or gross, working out and getting fit doesn’t have to be painful, stressful, or uncomfortable.

Wrapping up, and other things to consider:

The arm blaster benefits are pretty straightforward, as well as how it’s used, but there are a few things to remember when using one, especially to lessen the chance of injuries such as strains or sprains.

Go easy on the weights

Something many people run into issues with is being a tad overeager when first starting a new regiment or when purchasing a new piece of equipment, and while enthusiasm is always beneficial and a welcome trait, this can create some problems if you let it take control.

The position and movement that the arm blaster puts the body in can be foreign, and those muscles may not be used to being stretched that way, so it’s important to remember to not lift your heaviest weights when first getting into the swing of things with your blaster. 

This will reduce your risks of straining the muscles and unintentionally injuring them!

Read all instructions, manuals, diagrams, blueprints, everything!

This is something that seems obvious but is another thing commonly overlooked and lost in that ‘new toy eagerness’ talked about, but one of the best ways to use your equipment or any new tool is to thoroughly read all instructions and manuals that come with it.

And studying any images included also helps the concepts stick, again, be sure not to disregard it and throw it away!

In summary:

The arm blaster benefits are plentiful and make it a valid tool to use, even though many have forgotten about it and tossed it to the wayside, but in recent years it’s been making a comeback, and hopefully the above has shown you for good reason!

Thanks for reading!

Spin Bike Computer

Spin bikes are a popular form of exercise equipment for numerous reasons; they are easy to use, great for people of all ages and fitness levels, and generally aren’t overly bulky, large, or pricey.

Spin bikes may be simple in their design and concept, but modern technology has added quite a few new tricks and features for this old toy, and one of them is the spin bike computer.

What exactly is a spin bike computer, and why use one?

The use of the console is quite simple, as it either comes preinstalled to some models of stationary bikes, or in wired or wireless versions that can be attached by the purchaser.

These little computers track many different stats while the spin bike is in use, such as speed, cadence, calories burned, time, and distance.

Keeping tabs on these stats is not only helpful to ensure you are meeting your goals, but many find being able to see the numbers in real-time, such as the calories burned during their spinning sessions, to be highly motivating.

Spin Bike Computers are highly useful for keeping tabs on your

Using a spin bike computer is also helpful at aiding the user in tracking their speed and time to make sure they are on target with the length and duration of their training sessions.

In general, higher intensity exercise offers many benefits such as higher calorie burn, better toning and building of muscles, and faster and more efficient weight loss, all of which are able to be tracked using the computer’s speed and distance section of the module.

How to use a spin bike computer and its features

Typically, the computer is attached to either the flywheel or handlebars of the bike, and many have compatibility with the vast majority of smartphones, enabling you to track and store your data and stats on your personal device.

As stated earlier, considering your monkey brain enjoys seeing tangible numbers, and those trends ebb and change over time, especially going higher with more consistent use and your improvements, it can be very beneficial for motivation and sticking to your exercise routine, thus making a spin bike computer or console a worthwhile investment.

Now, onto the features!

Calorie count

This handy feature calculates your calories burned by measuring your speed, distance, and overall intensity of your spinning session, although, like all calorie counters on workout equipment, these numbers can have a slight margin of error, so its best to use it as a rough estimation.

Always remember to stick to your calorie goal or other diet plan, do not eat more specifically to ‘treat yourself’ by having worked out or overcompensate for the number of calories you assumed you burned!

This is what often has people undo or entirely negate their progress and be confused about why they’re either not seeing results, or that their weight has “plateaued”.

Timer

From the moment you turn it on and start pedaling, this feature starts a timer and calculates how many seconds as well as minutes your spinning session has been going on, very useful for trying to keep the length of your workouts exact, especially when only having time to squeeze in 10 or 15 minutes on your bike.

Also very beneficial for pushing your sessions to be slightly longer each time, and improving your max.

Mileage

The mileage module of the spin bike computer calculates the general “distance” traveled of your spinning session, basically, the equivalent to the number of miles traveled if you were on a traditional bicycle, another great metric to be able to track and compare between workouts to bolster motivation.

Speed

The speed section tracks your current, average, and max speed during your workout, its a great metric to watch when you wish to push yourself and see what the highest max and average you can get to! 

Very encouraging and fun to use on any machine!

Cadence

Cadence is a measurement of the number of pedal stroke revolutions per minute (RPM) in all forms of cycling, including traditional and spinning.

An example would be that a cadence of 50 would mean that the pedals make a full revolution 50 times in one minute.

Spin bikes themselves often come with computers that monitor this, but you can also do it by hand by counting the revolutions of one of your legs for 15 seconds, and then multiplying by 4.

Spin bike computers have many helpful settings and uses.

Other methods include using a stopwatch and counting the number of times your leg pushes down on the pedal for around 30 seconds and multiplying that number by 2.

A simple option if this is too confusing is to count for 10 seconds and then multiply by 6 with the use of your stopwatch.

Spin bike computer: important notes to remember

Buying a wireless cycling monitor is much simpler than a wired one if using for a spin bike because installation is far less of a pain in the neck than having to play around with wires and adjustments, and is more convenient if it can be synced with a device such as a smartphone, for better data keeping, logging, and storage.

In general, however, to cut down on user error and the amount of technical know-how needed, its a better idea to purchase a spin bike computer specifically made for your machine rather than modify an existing traditional bike monitor, as this increases the risks of inaccuracies and issues setting it up, as well as making sure it continues to work and track accurately.

Another helpful tip is to, as mentioned earlier, consider purchasing a heart rate monitor, such as one that attaches to your forearm, as this enables you to better keep tabs on the intensity of your exercise session. Mainly because this information can be very useful and helpful if doing HIIT(High Intensity Interval Training) or simply trying to ensure you keep pushing yourself.

Remember to read the fine print of your potential spin bike computer to make sure it’s properly compatible with your specific model and type of bike, the phrase “an ounce of prevention is worth a pound of cure” rings true here as it saves you the headache of being stuck with something you can’t use or have to return. 

Many of these computers are made specifically for use on traditional bikes, which makes them inaccurate and inconsistent often when using them for spin bikes or other stationary bicycles.

A word of caution regarding monitors and fitness trackers of any sort, some people can become a tad bit obsessed with their progress and watching those numbers go up, which can cause them to push themselves unnecessarily and risk injury and burnout.

Spin Bike Computers can be mounted on the stand often used for tablets or phones.

I had this experience when using my elliptical and staring at the calories burned option, aiming to burn a certain amount each session, and making it last a set amount of time while watching the timer, regardless of how I felt because that’s what my brain decided felt overall the most pleasing to me.

So if you’re someone with those sorts of potentially OCD like tendencies, it’s best to keep an eye on yourself to be certain you’re not overdoing it with your exercise, as burnout and quitting is a far worse end result than slowly taking your time and gradually getting to where you wish to be.

Another note is to keep an eye out for a good warranty with your purchase as well since you never know if the computer you purchase could be defective and die on you within the typical year-long warranty period, and since these devices are around 60 to 200 dollars a pop, that can be fairly irritating.

Wrap up!

In general, spin bike computers aren’t an absolute necessity but are an extremely helpful and very motivating tool when it comes to tracking your fitness progress and setting and accomplishing goals for yourself.

They’re not super pricey and you can get plenty of long use out of them, so they’re worth considering for any spin bike owner.

Thanks for reading, and happy riding!

Treadmill Incline Benefits

What is a treadmill incline?

Many newer models of treadmill have all sorts of new bells and whistles and settings, and one of those mainstay features is the treadmill’s incline setting. 

This feature allows you to use the machine while elevated at a slight angle of your choosing, generally anywhere from 2 to 15 percent, as a result, the treadmill incline benefits offers a whole host of practical uses and additions, from higher calorie burn, more effective weight loss, to better muscle building.

Let’s get right into it!

The treadmill incline burns more calories than walking on the flat surface.

It’s a well-known fact that climbing stairs and walking uphill are very effective ways to burn calories and get the heart pumping, as well as build stamina, and the same benefits are there with the use of the incline settings on your treadmill.

Your body burns an estimated 3 to 5 extra calories per minute depending on your incline’s settings and, turned to the average max settings of 15 percent, you burn 60 percent more calories running or 150 percent higher when walking!

The increase in effectiveness is because the extra steepness works the body harder than the regular flat surface of the treadmill base, elevating the heart rate, and engaging more of the muscles, which in turn, heightens the intensity of your workout.

Many treadmills nowadays are equipped with an incline setting, which offers a host of benefits.

Walking downhill and or on a level surface tends to put marginally less strain on the body, but isn’t the best for calorie burn or getting a good workout, so if that’s your goal, using the incline or taking a jog somewhere uphill or with stairs is the way to go.

The treadmill’s incline offers a variation to workouts, making them less stale and repetitive.

Treadmills are a common and reliable form of exercise equipment primarily because they’re easy for anyone to use, considering that as long as the individual can walk and does not suffer from mobility problems, the treadmill will provide a safe, effective, and low impact form of exercise.

This trait might make them ideal for many, but a problematic sticking point does come as a result of that simplicity, which is that walking in a straight, fixed line with no bumps, curves, or changes of scenery can be uneventful and boring.

Very boring.

Especially considering the average person will workout on their machine for 10, 15, 30, or more minutes, so that can be a lot of time spent walking in place and staring and nothing, even if the treadmill sits in your TV room!

Making use of your treadmills more modern features will add more spice and variety to your exercise routine and allow one to break up the excess monotony present in your workouts.

The incline setting, like the speed options, offer a way of relieving some of the boredom that can come from the same old motion, along with reducing the risk of a repetitive motion injury or stress fracture from overuse of the same muscles each treadmill session.

The treadmill incline helps more realistically simulate walking, rather than a static flat surface.

Whether you’re training for a 5K or just looking for something that allows you to get in your jogging, running, or walking routine while staying out of inclement weather, the treadmill is a great choice to do so!

Making use of the incline allows you to have a more natural gait when running or jogging on your machine, and as a result, the motion will put less strain on your body and allow you to get in your routine morning jog, regardless of the weather, and without the risk of falls!

Using the incline on a treadmill can be beneficial for breaking up boredom during exercise.

There are controversy and debate on if setting the incline at 1 or 2 percent can better match the conditions that the average runner would encounter, however, many experts agree it’s the body’s “perceived effort” that aids in the runner pushing themselves harder outdoors during workouts than they do dissociating from boredom while on the treadmill.

So, in general, making use of a heart rate monitor on your outdoor runs and focusing on what your stride is like, and how your body moves during the process can help to get a better average of what your energy expenditure is like, which you can then do your best to emulate during your treadmill sessions.

Treadmill inclines build more muscle, especially in the ankles, calves, and upper legs.

Walking on a level and entirely flat surface is not only boring and repetitive but also isn’t all that helpful at activating muscle groups and helping build them, mainly due to the simplicity in the exercise sessions and them not being very challenging or higher intensity.

The incline option is a game-changer for this, however, and works muscle groups in the legs, calves, ankles, and upper thighs as well as the glutes, as the steepness simulates walking uphill, which is an excellent way of building muscle and strength in the legs.

This is especially helpful for those who have leg or joint pain or are newly out of rehab or hospital stay in general and need something that won’t aggravate the existing injury or pain too much.

The steeper the incline settings, the better the muscle build and toning, so gradual experimentation with increasing the incline is a good way of determining how much you can handle at the start.

Using a treadmill’s incline settings help enhance and intensify your workout, furthering your stamina increase, and elevate your heart rate, helping shed calories easily.

Treadmills can burn calories with fairly little effort, especially in comparison to machines like the rower, which makes use of many of the bodies major muscle groups, creating an exhausting but effective workout.

But many people aren’t up to something quite as strenuous, especially if they have lower back issues or problems with mobility.

This is again where the treadmill shines through with its low impact and simple to use design, coupled with the incline, average treadmill sessions can easily burn anywhere from 100 to 300 or more calories.

This, of course, depends on your weight, height, and gender, and plenty of online calculators exist to plug in your individual stats so you can tailor your workout to accommodate your calorie-burning goals.

Other important aspects to remember is that any exercise is better than none, such as if you only have 10 or 15 minutes to spare for your treadmill sessions, exercising at a faster speed and at a sharper incline increases the intensity of the workout, which equals higher calorie burn.

It’s essential to not overdo this, however, and start out gradually during these brief sessions of higher intensity with a warmup to ease your body into the process, lest you risk injury and unneeded soreness.

If you have more time to spare, longer sessions, such as 30 minutes of moderate-intensity running, or varying your pace for several seconds of higher intensity during the moderate to low level workout, can also aid to increase calorie burn without putting extra strain on the body like going hard for the entire duration would.

Overall, it’s best to experiment and do what feels and works best for you, and remember that warmups and gradual increases in incline, speed, and intensity are essential for working out safely!

Wrapping up!

Treadmill inclines offer a wide range of benefits and potential uses, and really very few if any, drawbacks, so you should give some good thought to purchasing a treadmill with this option if you are in the market for one.

The treadmill may be an old machine, but who says an old dog can’t learn new tricks?

Thanks for reading, and well wishes in health and fitness!

Air Bike Vs Rower

Air Bikes are known for their exceptional muscle toning and calorie burning potential, and the same goes for rowing machines. In the case of Air Bike Vs Rower, how do they compare? Let’s find out!

What is an air bike?

The air bike, also called the fan bike, is a type of stationary bicycle meant for indoor based use and exercise.

They are notable for the large fan attached that generates varying amounts of wind force the harder you peddle, which is what creates the bike’s resistance.

Air bikes and rowing machines are both beloved equipment and have similar benefits, but in the case of air bike vs rower, how do they compare?

Unlike other exercise bikes, the air bike does not have any adjustable resistance settings, buttons, or gadgets, because, as mentioned above, the resistance is determined entirely by how fast the user peddles, making the workout easy to tailor to the individual.

It is also equipped with handles that move as you peddle, aiding in working out parts of the upper body as well.

They are also known for their exceedingly high calorie burn, commonly burning anywhere from 20 to 30 calories per minute, and the record being held at 87 calories per minute! 

What is a rower?

A rower also called a rowing machine or indoor rower is a type of exercise machine meant to simulate the motion and benefits of rowing a watercraft, minus the need for a boat, a paddle, or a source of water!

Rowers are known for their low impact benefits and coupled with being easy to use, makes the machine a great choice for those with joint problems such as arthritis, or those recovering from injuries.

Head to head: air bike vs rower breakdown!

It’s time to get into the real meat of this article, and that is, how do air bikes and rowers stack up and compare to each other?

Do they share similar benefits, general pros, and cons? 

How do their costs reflect their high quality and popularity; can the average Joe afford either of these beasts of a machine? 

Let’s get right into it!

Air bike vs rower for calorie burn

Both rowing machines and air bikes burn a lot of calories, so when considering the purchase of some new gym equipment for losing weight, either can be an excellent choice and more than satisfactory for the task.

But to be specific, let’s look into just how many calories they can burn in a session.

The air bike can burn as many as 300 calories in as little as 20 minutes of pedaling, and rowing machines are no slouch either, burning up to 200 to 300 calories in 30-minute sessions.

These details on how much the individual will burn do vary widely with the height and weight of the person using the machines, so it’s best to keep this in mind when trying to calculate your specific calorie-burning goals.

Thankfully, calorie burn calculators exist plentifully online, allowing you to input your height, weight, type of exercise, intensity, and the length of your workout session to get a firm, rough estimate on your particular stats.

Rower machines, like air bikes, yield very high calorie burn.

The main point to remember about burning calories during exercise is that more vigorous and higher intensity workouts burn more calories and at a faster rate, with or without machinery.

Exercise equipment that tends to involve more muscle groupings that get worked on during sessions also can make a difference in how many calories, and subsequent pounds can be lost.

Also important is that the more muscle you put on, the more calories you burn, so both of these aspects combined can substantially accelerate your weight loss!

Air bike vs rower for cost-effectiveness

Everyone wants high quality and effective exercise equipment, and upon seeing the multitudes of benefits touted by rower and air bike enthusiasts, many will be tempted to hop right on the bandwagon and purchase their own without a second thought.

However, unless you’re Daddy BigBucks, budgets are an unfortunately common and realistic sticking point for the vast majority of people, especially for big-ticket items, so it’s important to consider costs when contemplating your next purchase.

In regards to the rower, the cost can vary depending on the specific type, especially ones with more “modern” features such as a built-in heart rate monitor or calorie burning tracker.

The single pull rowers tend to be on the pricier side at an average cost of generally 200 dollars or more, capping out at around 2k depending on the specific build and features, of course.

Cost is a important factor to consider when purchasing a rower or air bike.

While machines that are closer to their watercraft rowing simulation origin are referred to as oar machines and generally cost upwards of anywhere from 150 to 700 dollars, making them slightly more affordable than the above type. 

Air bikes, as a general rule, are more expensive, however, generally costing upwards of 700 dollars, maxing out at 3k!

While there are smaller models of bikes with a fan attached that can be purchased for under 600 dollars or so, those tend to not have as durable a build nor allow for as much intensity with exercise sessions. 

Similar, but not really at all the same.

Air vs rower for user-friendliness

Both rowers and air bikes are fairly easy to use for most people, as in the rower’s case, the user grasps the ‘oar’ and pulls and pushes in a linear motion, which engages many muscles of the lower and upper body in the process.

It’s important to remember and make use of proper rowing form when using the machine though, as rowing can be a high-intensity exercise, and as such, soreness and aches are a common problem if the user hunches and uses the rower improperly.

Gripping the oar too tightly can also cause soreness and pain from increased tension in the hands and arms.

More common mistakes when using the rower also include lifting the oar too high, which puts unnecessary strain on the arms, and letting the legs and knee bend outward to the side, rather than keeping them firmly straight and in line with the hips.

The air bike is simply used by pedaling and grasping the movable handlebars as you go through the workout, making it a low strain on the body and easy to use.

Both rower machines and air bikes are easy to use.

Many air bike veterans note that it’s important to not overtax the arms and use them too much, but to put most of the focus of your energy on the lower body and legs for pedaling, as this prevents upper body soreness and tiring yourself out too fast.

Adjusting the seat to ensure you’re in a comfortable position is also important, as, like the rower, proper form is essential for preventing extra soreness or pain from workouts.

Keeping the ball of your foot on the pedal rather than the whole foot also aids in putting more power in your pedaling, and taking as much strain off your lower legs as possible by not overworking them with overly strenuous strides.

A neutral and straight head position focused on looking forwards is also helpful for keeping one’s form optimal, and preventing neck soreness from glancing down at monitors or other areas of the machine.

Air bike vs rower for toning and muscle building

Rowing machines are estimated to engage up to 85 percent of your muscles when the ideal form is used, making them amazing machines for building and toning muscle, which will, in turn, help you lose weight faster and more effectively.

Due to this, rowing is considered a full-body workout and an excellent way of getting and staying in shape!

Even the most relaxed rower can burn calories and get effective cardio benefits from the use of the machine, as in general, rowing is high intensity and best of all, is low impact, making it easy on the joints and body, with none of the negatives.

While air bikes may not engage as many muscle groups as the rowing machine, they are no stranger to high intensity and low impact exercise.

Rowers and Air Bikes build muscle exceptionally well.

Air bikes are still amazing at toning the body and building muscle, but mainly the lower and some of the upper portions, though the potential cannot be overstated due to the limitless resistance and intensity controlled by the user’s pedaling ability.

Air bikes are considered some of the most top-notch equipment for cardio and stamina training as well, mainly due to how intense the workouts can be when the user is going at full throttle on the machine.

In general, both take considerable work for the body to use, so are highly efficient at getting you in shape and strengthening any existing muscles.

What are their main differences and similarities?

Rowing machines can be more physically taxing on the body than air bikes, as the use of the equipment requires considerable bending of the knees and stretching of the body, which can be strenuous on many new rowers.

In contrast, cycling on an air bike is a lower impact form of exercise because of less strain placed on the body, primarily the legs and back, and requires fewer physically taxing movements.

Both also have the potential of providing full-body workouts, but the rower requires most of the body to use on a regular basis, while the air bike has optional uses of other parts such as the upper body.

Both machines tend to be larger in size and build, so they take up a decent amount of floor space each, but the air bike takes up less considering its upright position in comparison to the rower’s elongated one.

Who should buy a rower?

Those with no knee or back related issues, a tighter budget, and a bit more space in their homes may find the rowing machine to be a better buy than the air bike.

Individuals who wish to strengthen and tone muscle for better sports-related performance and aerobic conditioning may also prefer the rowing machine.

Who should buy an air bike?

If you have knee or back pain, especially in the lower back, then an air bike is a better choice in exercise equipment if you have the budget for it, because unlike the rower, it doesn’t strain the knees or back as much.

If you enjoy stamina training and high-intensity interval training, then the air bike is also an ideal choice for situations like this as well, provided you have the budget for it.

Wrapping up

Air bikes and rowers have many similarities; they both provide amazing workouts, burn impressive amounts of calories per session, and are highly effective for toning muscle and cardiovascular conditioning.

However, each machine has its pros and cons, as well as differences, so it’s important to evaluate the individual factors and features and make the decision for which one will work best for your circumstances.

Thank you for reading, and best wishes!

Cross Trainer Vs Elliptical

Cross trainers and ellipticals have many of the same benefits and disadvantages, but also several distinct differences, here is a breakdown of all things to know; cross trainer vs elliptical!

What is a cross trainer?

A cross trainer also called an elliptical trainer, is a stationary piece of exercise equipment that simulates walking, running, and stair climbing, all while engaging the arms and upper body as well.

Cross trainer vs elliptical is a topical theme considering the popularity of both machines.

It is an upright machine with pedals, handlebars, and no saddle, and resembles an exercise bike.

They are notable for their low impact but effective workouts that limit stress and strain on the joints, making them suitable for the vast majority of people to use.

What is an elliptical?

While the cross trainer is another type of elliptical, a traditional one has regular stationary bars that can be gripped onto, since, unlike the cross trainer, these do not move, so the majority of workout benefits are located in the lower body.

Ellipticals are very similar to cross trainers, as the cross trainer is a type of elliptical.

Regular ellipticals also are low impact and safe for people of all ages to use, making them a common and popular choice of fitness gear for many.

What are the differences between cross trainers vs ellipticals?

As mentioned above, cross trainers have moving handlebars and a different shape than traditional ellipticals, and some cross trainers have wheels, allowing them to be easily moved to place to place if a change of scenery is desired.

Recumbent cross trainers also exist and are made for the user to sit on while exercising, in a not so dissimilar way to a spin bike, making them a great choice for those with trouble standing, as well as for people with more advanced joint issues.

The moving handlebars of the cross trainer allow the user to get more of a full-body workout as well because pushing and pulling the bars enables the core, arms, and upper body to get in on the action.

These additions and changes to traditional ellipticals enable the cross trainer to have more flexibility in uses and burn more calories than regular ellipticals because of more muscles being engaged during workout sessions.

However, the stationary handlebars can also be a benefit for those with joint issues in the upper body that may get strained by using the moving options, so this is a matter of choosing what might work best for you based on your circumstances and the type of workout that you desire.

Older individuals or those with balance-related problems may find the basic elliptical with its static handlebars for support easier and safer to use and grip onto, and someone younger and more fit may prefer the moving handlebars to get a more intense workout and improve balance.

Cross trainers also lack the adjustable incline for the leg pedals which is a common element of the traditional ellipticals, so if that type of variance in your workout is preferred, the latter might be a more suitable purchase.

However, many cross trainers are equipped with dual motion capabilities, such as being able to pedal forwards and backward on the machine, which works different muscle groups and enables variance in the workout to limit the staleness which can come from repeated sessions.

How much do cross trainers and ellipticals cost?

Miniature ellipticals that work just the lower legs are an option for those with little space in their homes, and for consumers on a tighter budget, these devices are often called “Under desk ellipticals” or “miniature ellipticals”, and they are on the cheaper side at about 200 to 500 dollars or so.

Budgets are a common aspect to consider when deciding on purchasing a cross trainer vs elliptical.

Standard size ellipticals often range anywhere from 600 to 2,000 dollars, depending on what features are added or built into the machine, along with the materials.

Cross trainers generally range from 600 to 1,500 dollars, depending on factors such as the above-mentioned features and specifications, but as a whole, many tend to be cheaper than standard ellipticals.

Head to head, cross trainer vs elliptical: benefits

Below is a general summary of how cross trainer vs elliptical stack up between each other, in short.

  1. Both low impact and easy to use machines, although the elliptical can be easier to use and safer for those with upper body joint issues.
  2. More muscle groups can be worked on with the moving handlebars of the cross trainer, and the heart rate is increased faster with this addition, making it a better choice for those who wish to train their stamina and heighten their calorie burn.
  3. Both machines are considered weight-bearing exercises, so they’re a perfect choice for people with osteoporosis or arthritis who need to incorporate exercise regimens that strengthen their bones.
  4. In general, a cross trainer is a better fit for those who are looking for a more complete workout for their entire body, while the traditional elliptical is better suited for those who are looking for something low impact that works mainly their lower body’s muscles.

What are the cons of both ellipticals and cross trainers?

  1. Both ellipticals and their cousins, the cross trainer, generally share similar pros and cons, such as not being the best fit for those with preexisting knee problems, since, even with being low impact, the way your weight is distributed on the machines can aggravate existing injuries or joint issues in the knees.
  2. Both machines may be versatile, but no gym equipment is perfect or can do absolutely everything, and the same is true for ellipticals and cross trainers because, if for example, you want to better condition yourself for a sport that involves running or jogging, a treadmill is a better choice for those circumstances, as they target the right muscles for the job.
  3. While both have folding options, they can take up a decent amount of floor space and may not be the best suited for apartments or small homes like other more space-saving equipment, however, folding options exist and might make storage easier in some cases.
  4. Ellipticals and cross trainers may be great for getting fit, burning calories, and enhancing stamina, but they’re not going to make you pack on muscle like other more intensive exercises, so if muscle building is your goal, the elliptical isn’t the right tool, unfortunately.

Other Notes and Wrapping Up

There are several varieties of elliptical and cross trainer, each has their own advantages and disadvantages, so it’s best to examine each of them and keep in mind what you wish to gain from your machine, as this will help you make a purchase of one that’s right for you.

Types and their specs

Rear-drive elliptical

The rear-drive variety is one of the older designs, but is still popular and holds up even today in many public and home gyms and garages.

This type is notable for its flywheel situated at the back of the machine, which makes the motion less erratic and gives the user a more smooth and natural gait while using it.

Front-drive elliptical

This kind if distinguished by its flywheel located at the front of the elliptical, with the roller tracks sitting in the back of the machine and the pedals gliding along these tracks.

Front-drive ellipticals may be preferable to those who have difficulty with using the full range of motion in their legs, due to them sitting lower to the ground than rear-drive machines.

Miniature Elliptical

These compact machines are often referred to as under-desk ellipticals due to their small size and being able to fit underneath the majority of desks in homes and offices.

They may not provide a full-body workout like what is typical of the elliptical, but they’re great for stress relief and getting in some extra exercise, and many studies have found increased memory and productivity benefits when office workers have access to machine such as these!

Center Drive Elliptical

Woman using a center drive elliptical

This type offers a more vertical motion due to its flywheel being located on either side of the pedals, essentially creating a movement similar to a stair-climbing machine.

Center drives tend to be more compact and upright, making them easier to store or use in small homes and apartments.

Elliptical Glider

Woman using a elliptical glider

Gliders are much smaller and more compact than the other models, sometimes called air gliders, they work in the same pedaling fashion as the other ellipticals, but have no flywheel and have the user walking without a set track or platform, just the pedals themselves.

Cross Trainer

Woman on a cross trainer

As mentioned at the start, the cross trainer is very similar to a stationary bicycle and often has a seat, especially in the case of the recumbent cross trainer, allowing the user to recline and relax while getting their workout session done.

They provide great full body and cardiovascular workouts.

Traditional Elliptical

Woman on a elliptical

The original tried and true version, the standard elliptical can have a flywheel in any position, and generally focuses on working out the muscles of the lower body, as it tends to have fixed handlebars for the user to hold, rather than moving ones.

A perfect machine for those in need of a lower intensity and low impact workout.

Wrapping up!

In general, regardless of the type or variety, both ellipticals and cross trainers are highly effective, safe, and low impact exercise machines that provide great cardiovascular workouts, especially to those who struggle to fit in their exercise in other ways as a result of injuries or joint issues and mobility problems.

I hope this article was informative and offered food for thought on what you may wish to consider when deciding to purchase a cross trainer vs elliptical as your next piece of gym equipment!

Best wishes, and thank you for reading!

When it comes to cross trainer vs elliptical, both are more than capable of getting you in shape.